GE DECT 28821 Manuel d'utilisateur
Naviguer en ligne ou télécharger Manuel d'utilisateur pour Répondeurs GE DECT 28821. GE DECT 28821 User's Manual Manuel d'utilisatio
- Page / 60
- Table des matières
- DEPANNAGE
- MARQUE LIVRES
- Model 28821 Series 1
- DECT 6.0 Cordless 1
- Handset Speakerphone 1
- Answering System 1
- User’s Guide 1
- Important Information 2
- Interference Information 3
- Telephone Network Information 3
- REN Number 4
- Licensing 4
- Information for DECT Product 4
- Table of Contents 5
- Introduction 8
- Before You Begin 8
- Telephone Jack Requirements 9
- Installation 10
- Handset Layout 12
- Installing the Phone 14
- Base Station 15
- Answering System Setup 16
- Set Prompt Language 17
- Rings to Answer 17
- Message Alert 18
- Security Code 18
- Speaker Volume 18
- Voice Instruction 19
- Programming the Telephone 20
- Add Records 21
- Stored Number) 21
- Edit Records 22
- Delete Records 22
- Ignore The Incoming Call 23
- Answerer 24
- Set Alarm Clock 24
- Handset Setup 25
- Handset Name 26
- Ringer Tone 26
- Ringer Volume 27
- VIP Melody 27
- Storing VIP Melody 28
- Key Tone 29
- Set Day/Time 29
- Equalizer 30
- Area Code 30
- Tone/Pulse 30
- Registration 31
- De-Registration 31
- Global De-registration 32
- Telephone Operation 33
- Speakerphone Operation 34
- Making a Call 34
- Answering Calls 34
- Call Timer 35
- Auto Standby 35
- Ringer Volume (Shortcut) 35
- Flash/Call Waiting 35
- Last Number Redial 36
- Handset to Handset Paging 36
- Receiver Volume Control 37
- Intercom Operation 38
- Receiving an Intercom Call 39
- Advanced Intercom Features 39
- Caller ID (CID) 40
- Call Waiting Caller ID 41
- Receiving CID Records 41
- Reviewing CID Records 42
- Dialing a CID Number 42
- Deleting a CID Record 43
- Deleting All CID Records 43
- Answering System Operation 44
- Screening Calls from the Base 45
- Message Playback 45
- Memory Full 45
- Erasing Messages 45
- Remote Access 46
- Location 47
- Connecting the Belt Clip 48
- Changing the Battery 49
- Battery Safety Precautions 49
- Display Messages 50
- Handset Sound Signals 52
- Troubleshooting Guide 52
- Answering System Solutions 54
- Causes of Poor Reception 55
- General Product Care 55
- Warranty 56
- Accessory Information 57
Résumé du contenu
Model 28821 SeriesDECT 6.0 Cordless Handset Speakerphone Answering SystemUser’s GuideYour new GE telephone system is EXPANDABLE up to a total of 6 ha
10Installation Digital Security SystemYour cordless phone uses a digital security system to protect against false ringing, unauthorized access, and ch
11Important Installation Guidelines• Avoid sources of noise and heat, such as motors, uorescent lighting, microwave ovens, heating appliances and di
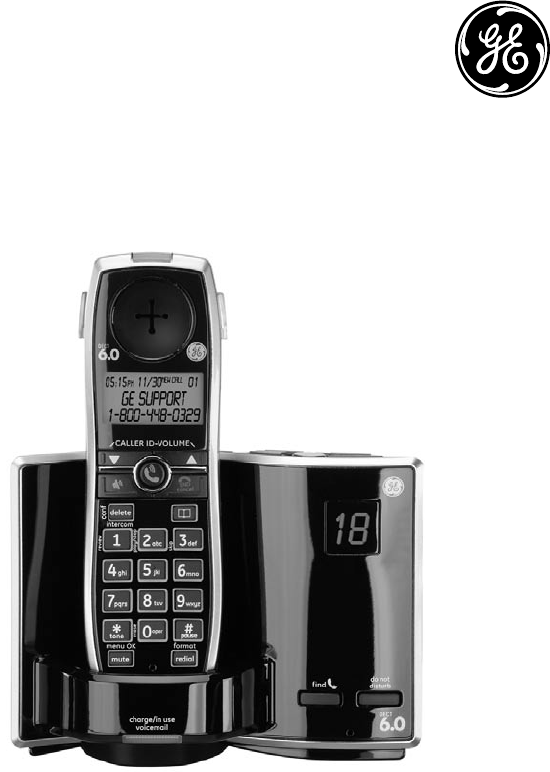
1Handset LayoutmicrophoneCALLER ID-VOLUME 6(caller id/volume down button)SPEAKER(button)* tone (button)mute/menu OK (button)displayTALK (button)END/c
1Base Layout (Top & Front Views)delete (button)volume 5/ 6 (buttons)skip (button)repeat (button)PLAY/STOP (button)speed (button)do not disturb (d
1Installing the PhoneInstalling the Handset BatteryNOTE: You must connect the handset battery before use.CAUTION: To reduce the risk of re or person
15Base Station1. Choose an area near an electrical outlet and a telephone wall jack (RJ11C), and place your cordless telephone on a level surface, su
16Answering System SetupThis section shows you how to set up your answering system to receive incoming calls. Before you begin the set up process, you
17Set Prompt LanguageFrom the Answerer Menu: 1. Press the CALLER ID-VOLUME (5 or 6) button to scroll to PROMPT LANG.. Press the mute/menu OK butt
18Message AlertThis feature sets your answering system to give an alert tone every 10 seconds when there are new messages.From the Answerer Menu: 1.
19Voice InstructionIf you need additional assistance, press the repeat button in standby mode and follow the voice instructions.Recording the Outgoing
Important InformationNOTICE: This product meets the applicable Industry Canada technical specications.Operation is subject to the following two cond
0Programming the TelephoneStandby ScreenThe handset displays the handset number and user name.Programming FunctionsThe system uses a menu structure t
1Add Records1. Make sure the phone is OFF (not in TALK mode).. Press the mute/menu OK button to go to the main menu.. Press CALLER ID-VOLUME (
Edit Records1. Make sure the phone is OFF (not in TALK mode).. Press the mute/menu OK button to go to the main menu.. Press CALLER ID-VOLUME (
Dialing a Number from Internal Memory1. Make sure the phone is OFF (not in TALK mode).. Press the mute/menu OK button to go to the main menu..
6. The receiving handset will turn on the microphone and the originating handset will turn on the speakerphone to monitor sound from the receiving
58. Press the mute/menu OK button to conrm and advance Set Cycle Time sub-menu.9. Use the CALLER ID-VOLUME ( 6 or 5) button to select Once or D
6Handset NameFrom the Handset Setup Menu: 1. Press the CALLER ID-VOLUME ( 6 or 5) button to scroll to the HANDSET NAME sub-menu.. Press mute/menu
7Ringer VolumeFrom the Handset Setup Menu: 1. Press the CALLER ID-VOLUME ( 6 or 5) button to scroll to the RINGER VOLUME sub-menu.. Press mute/men
8Storing VIP MelodyFrom the Handset Setup Menu: 1. Press the CALLER ID-VOLUME ( 6 or 5) button to scroll to VIP MELODY sub-menu. . Press mute/me
9Reviewing And Deleting Stored VIP Melody RecordFrom the Handset Setup Menu: 1. Press the mute/menu OK button to enter to VIP MELODY menu.. Use t
Interference InformationThis equipment generates and uses radio frequency energy which may interfere with residential radio and television reception
06. Press the mute/menu OK button to save your selection. You will hear a conrmation tone and the current time shows in the display.EqualizerThis
1. Press the mute/menu OK button to conrm. You will hear a conrmation tone and your selection shows in the display.RegistrationYour packaged hand
. Use the touch-tone pad to select 1 for YES or for NO. Or use the CALLER ID-VOLUME ( 6 or 5) button to scroll to 1YES or 2NO.WARNING: It is n
Default SettingAs you become familiar with this system, you may prefer to use the system’s original settings. Follow the steps below to return to th
Speakerphone Operation.NOTE: If you are using the speakerphone, remain close to handset so the party you are speaking to can hear you. If you are us
5Ignore The Incoming CallWith this feature, you can transfer all the incoming calls to the answering system.When the phone rings, press the END/cance
6Last Number RedialYou may redial a number up to 5 digits long. To quickly redial the last number you dialed:1. Press the TALK or SPEAKER button.
7. To cancel the page, press the END/cancel, delete/intercom/conf, or TALK button on the originating handset, or press the END/cancel button on th
8Do Not Disturb (D-N-D) This feature allows you to turn off all the handset ringer(s) at once, by pressing one button at the base unit, even though t
9Receiving an Intercom CallWhen you receive an intercom call, your handset beeps. To answer the call press the delete/intercom/conf button or TALK bu
REN NumberOn the bottom of this equipment is a label indicating, among other information, the Ringer Equivalence Number (REN) for the equipment. The
0. Use the touch-tone pad to select Handset #. You will hear a paging tone and PAGING shows in the originating handset’s display.NOTE: PAGING FROM.
1Call Waiting Caller IDProvided you subscribe to Call Waiting Caller ID service from your phone company; if you receive an incoming call and you are
Reviewing CID RecordsAs calls are received and stored, the display is updated to let you know how many calls have been received. To scroll CID recor
. Press mute/menu OK button to go to the main menu.. Press CALLER ID-VOLUME ( 6 or 5) button to scroll to PHONEBOOK.5. Press mute/menu OK bu
Answering System OperationThis section discusses the buttons and features on the answering system.Message Counter IndicatorThe message counter gives
5Screening Calls from the Base1. When the answering system answers the call, listen while the caller leaves a message (to determine who is calling)
6. Press the delete button, the current message is erased, and the next message plays.To erase all previously played Messages in a mailbox1. Make
7Screening Calls from the HandsetUse the handset to screen calls even when you can’t hear the answering system.When the answering system picks up:1.
8Memory FullWhen the answering system memory is full, the system answers after 10 rings, beeps and waits for you to enter the -digit security code.
9Changing the BatteryCAUTION: To reduce the risk of re or personal injury, use only the Thomson Inc. approved Model 5-2814 Nickel-metal Hydride batt
5Important InformatIon ...2Interference InformatIon ...3telephone network InformatIon ...3ren number
50Display MessagesThe following messages shows the status of the phone, provides Caller ID information, or helps you set up and use your phone.ANSWERE
51INCOMPLETE DATA Caller information is interrupted during transmission or the phone line is excessively noisy. Indicates no CID information was rece
5Answering System Display MessagesThe following messages show the status of the answering system or help you set up and use the system.0-59 Indica
5• Make sure the battery is properly charged (for 16 hours).• Make sure the battery pack (in the handset) is properly installed.• The handset shou
5Caller ID SolutionsNo Display• Charge the battery (for 16 hours). Or replace the battery.• Make sure the unit is connected to a non-switched elect
55• You may have accidently pressed the play/stop button during playback and stopped the message.Won’t respond to remote commands• You must use a to
56WarrantyThomson Multimedia Ltd., warrants to the purchaser or gift recipient that if any manufacturing defect becomes apparent in this product withi
57To order, call the nearest distributor for your area;Ontario: (905) 624-8516 Manitoba: (204) 783-2088British Columbia: (604) 438-8001 Q
58IndexAAccessing the Answering System from Another Location 7Accessory Information 57Add Records 1Advanced Intercom Features 9Answerer 16,
59IndexLLanguage 5Last Number Redial 6Leaving a Message/Memo Licensing MMaking a Call Making an Intercom Call 8Memory Full 5, 8Messag
6gloBal De-registration ... 32DeFault setting ... 33telephone operatIon ...
Model 881 0005961 (Rev 0 Can E) 08-11 Printed in ChinaThomson Multimedia Ltd.0 Eglinton Ave W., Suite 0Mississauga, ON Canada L5R E7 © 008 Th
7answerIng system dIsplay messages ...52handset sound sIgnals ...52troubleshootIng guIde ...52telePhone solutio
8BaseHandsetTelephone line cordAC power adaptorHandset battery packBelt clipBattery compartment coverWall mount bracketIntroductionCAUTION: When using
9For Model 28821xx2 there will be ONE additional handset, charge cradle, belt clip, battery pack and cover than shown above.NOTE: If a speaker box is
Produits connexes et manuels pour Répondeurs GE DECT 28821

 (80 pages)
 (56 pages) (4 pages)
© 2020, manymanuals.fr. Tous droits réservés | 0.826 s |
 Manymanuals.com
 Manymanuals.de
 Manymanuals.fr
 Manymanuals.it
 Manymanuals.pl
 Manymanuals.cz
 Manymanuals.es
 Manymanuals-pt.com
Commentaires sur ces manuels