GE DPSR610GGWT Manuel d'utilisateur

Naviguer en ligne ou télécharger Manuel d'utilisateur pour Sèche-linge électrique GE DPSR610GGWT. GE DPSR610GGWT User's Manual Manuel d'utilisatio

  • Télécharger
  • Ajouter à mon manuel
  • Imprimer
  • Page
    / 8
  • Table des matières
  • MARQUE LIVRES
  • Noté. / 5. Basé sur avis des utilisateurs
Vue de la page 0
Installation
Instructions
Gas Dryer
If you have any questions, call 1-800-GECARES (US) or 1-800-361-3400 (Canada)
or Visit our Web site at:
www. GEAppliances.com
MATERIALS YOU WILL NEED
LEVEL
Step 1 Verify Your Gas Installation (see section 2).
Step 2 Prepare the Area and Exhaust for Installation of
New Dryer (see section 1).
Step 3 Check and Insure the Existing External Exhaust is
Clean (see section 1) and Meets Attached Installation
Specifications (see section 6).
Step 4 Remove the Foam Shipping Pads (see section 1).
Step 5 Move the Dryer to the Desired Location.
Step 6 Level Your Dryer (see section 8).
Step 7 Connect the Gas Supply (see section 3) and check
for leaks (see section 4).
Step 8 Connect the External Exhaust (see section 7).
Step 9 Connect the Power Supply (see section 5).
Step 10 Check the Operation of the Power Supply, Gas
Connections, and Venting.
Step 11 Place the Owners Manual and the Installation
Instructions in a Location Where They Will Be
Noticed By the Owner.
For Alcove or Closet Installation see section 9.
For Bathroom or Bedroom Installation see section 10.
For Mobile or Manufactured Home see section 11.
8" PIPE WRENCH
D
E
S
I
G
N
C
E
R
T
I
F
I
E
D
06
In the state of Massachusetts, installation must be performed by a qualified
or licensed contractor, plumber, or gasfitter qualified or licensed by the state.
WARNING
RISK OF FIRE
To reduce the risk of severe injury or death, follow all installation instructions.
Clothes dryer installation must be performed by a qualified installer.
Install the clothes dryer according to these instructions and in accordance with
local codes. In the absence of local codes, installation must comply with National
Fuel Gas Code, ANSIZ223.1/NFPA 54 or the Canadian Natural Gas and Propane
Installation Code, CSA B149.1.
This dryer must be exhausted to the outdoors.
This act requires the governor of California to publish a list of substances known to the
state to cause cancer, birth defects or other reproductive harm and requires businesses to
warn customers of potential exposure to such substances. Gas appliances can cause minor
exposure to four of these substances, namely benzene, carbon monoxide, formaldehyde
and soot, caused primarily by the incomplete combustion of natural gas or LP fuels.
Properly adjusted dryers will minimize incomplete combustion. Exposure to these
substances can be minimized further by properly venting the dryer to the outdoors.
California Safe Drinking Water and Toxic Enforcement Act
Use only 4” rigid metal ducting for exhausting the clothes dryer to the outdoors.
Do not install or store this appliance in any location where it could be exposed to
water and or weather.
Save these instructions. (Installers: Be sure to leave these instructions with the
customer).
DO NOT install a clothes dryer with flexible plastic ducting materials. If flexible
metal (semi-rigid or foil-type) duct is installed, it must be UL-listed and installed
in accordance with the instructions found in "Connecting The Dryer To House
Vent" on page 6 of this manual. Flexible ducting materials are known to collapse,
be easily crushed, and trap lint. These conditions will obstruct dryer airflow and
increase the risk of fire.
BEFORE YOU BEGIN
Read these instructions completely and
carefully.
IMPORTANT-
Save these
instructions for local inspector’s use.
IMPORTANT-
Observe
all governingcodes and ordinances.
Note to Installer - Be sure to leave
these instructions with the customer.
Note to Customer -
Keep these
instructions with your Use and Care
Book for future reference.
Before the old dryer is removed from
service or discarded, remove the dryer
door.
Service information and the wiring dia-
gram are located in the control console.
Do not allow children on or in the
appliance. Close supervision of child-
ren is necessary when the appliance is
used near children.
Install the dryer where the temp-
erature is above 50°F for satisfactory
operation of the dryer control system.
Inspect the dryer exhaust outlet and
straighten the outlet walls if they are
bent.
EXHAUST HOOD
FLEXIBLE GAS LINE CONNECTOR
SOAP SOLUTION
FOR LEAK DETECTION
PIPE
COMPOUND
DUCT TAPE
GLOVES
SAFETY GLASSES
4" DIAM METAL ELBOW
10" ADJUSTABLE WRENCHES
(x2)
4" DUCT CLAMPS
OR
4" SPRING CLAMPS
(x2)
(x2)
TOOLS YOU
WILL NEED
SLIP JOINT PLIERS
FLAT BLADE SCREWDRIVER
4" DIA. FLEXIBLE METAL (SEMI-RIGID)
UL LISTED TRANSITION DUCT
(IF NEEDED)
KIT WX08X10077 (INCLUDES 2 ELBOWS)
4" DIA. METAL DUCT
(RECOMMENDED)
4" DIA. FLEXIBLE METAL (FOIL TYPE)
UL LISTED TRANSITION DUCT
(IF NEEDED.)
Vue de la page 0
1 2 3 4 5 6 7 8

Résumé du contenu

Page 1 - Instructions

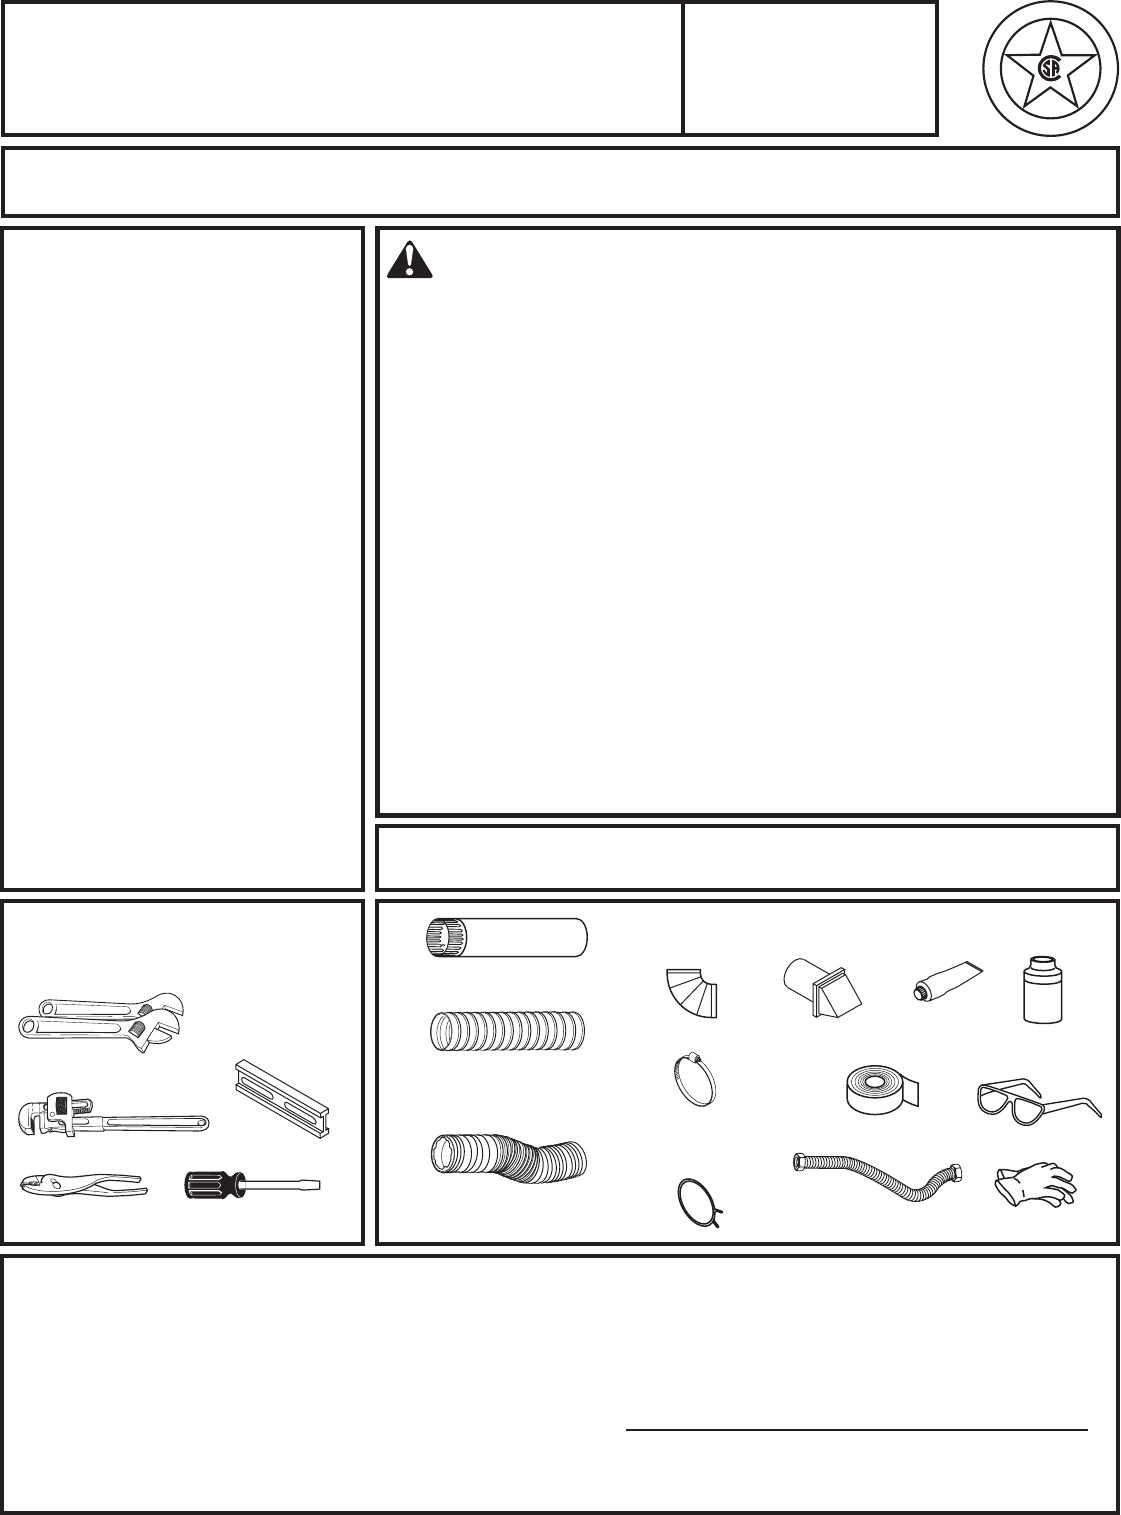
InstallationInstructionsGas DryerIf you have any questions, call 1-800-GECARES (US) or 1-800-361-3400 (Canada)or Visit our Web site at: www. GEApplian

Page 2 - Installation Instructions

Installation Instructions1 PREPARING FOR INSTALLATION OF NEW DRYERMinimum Clearance Other Than Alcove or Closet InstallationMinimum clearance to c

Page 3 - 3 RECONNECTING GAS

34 LEAK TESTInstallation Instructions3 RECONNECTING GASFLARENPTPIPE SIZEListed connector ANSI Z21.24 / CSA 6.10Caution: Use adapters as shown. Conne

Page 4

5 ELECTRICAL CONNECTION INFORMATION4Installation Instructions• DO NOT USE AN EXTENSION CORD OR AN ADAPTER PLUG WITH THIS APPLIANCE.Dryer must be

Page 5

58 LEVELING DRYERInstallation InstructionsLEVELSIDE-TO-SIDE.4 LEVELING LEGS2 ANTI-TIP LEGSLEVELFRONT-TO-BACK.STAND THE DRYER UPRIGHT NEAR THEFINAL LO

Page 6

6 9 ALCOVE OR CLOSET INSTALLATION10 BATHROOM OR BEDROOMINSTALLATION11 MOBILE OR MANUFACTUREDHOME INSTALLATIONInstallation Instructions• The dryer

Page 7

7Installation Instructions12 DRYER EXHAUST TO LEFT ORBOTTOM CABINETWARNING - BEFORE PERFORMINGTHIS EXHAUST INSTALLATION, BE SURETO DISCONNECT THE DR

Page 8

Installation InstructionsTO REGISTER YOUR DRYERCALL TOLL-FREE1-888-269-1192Prompt registration confirms your right to protection under theterms of you

Commentaires sur ces manuels

Pas de commentaire